使用 `margin-trim` 实现更简便的布局
如果你经常编写 CSS,你一定熟悉那些不确定如何实现目标功能的时刻。通常,你会查阅教程或文档,学习更多 CSS 知识来完成工作。但偶尔,你会发现并没有“正确”的方法来实现你想要的功能。于是你便会想出(或借用)一个感觉像是“小技巧”的解决方案。这可能需要大量复杂的选择器。或者它可能适用于你当前的内容,但你担心将来,如果有人向网站添加了不同的 HTML,你编写的解决方案就会失效。
在过去十年中,CSS 已经成熟了很多。许多健壮的解决方案弥补了以前需要脆弱“小技巧”的空白。现在,又多了一个——margin-trim。
外边距修剪 (`margin-trim`)
margin-trim 属性允许你告诉一个容器修剪其子元素的边距——任何与容器相邻的边距。一举之下,子元素与容器之间的所有边距空间都被消除了。

这也适用于当边距位于孙子元素、曾孙元素或曾曾曾曾孙元素上时。如果容器内任何内容通过边距创建了空间,并且该空间与容器相邻,那么当 margin-trim 应用于容器时,该空间就会被修剪掉。

让我们想象一个实际的例子。假设我们有一个 article 元素,其中包含多个段落,并且这些段落都有外边距。同时,该容器也有内边距。
article {
  padding: 2lh;
  background: white;
  p {
    margin-block: 1lh;
  }
}
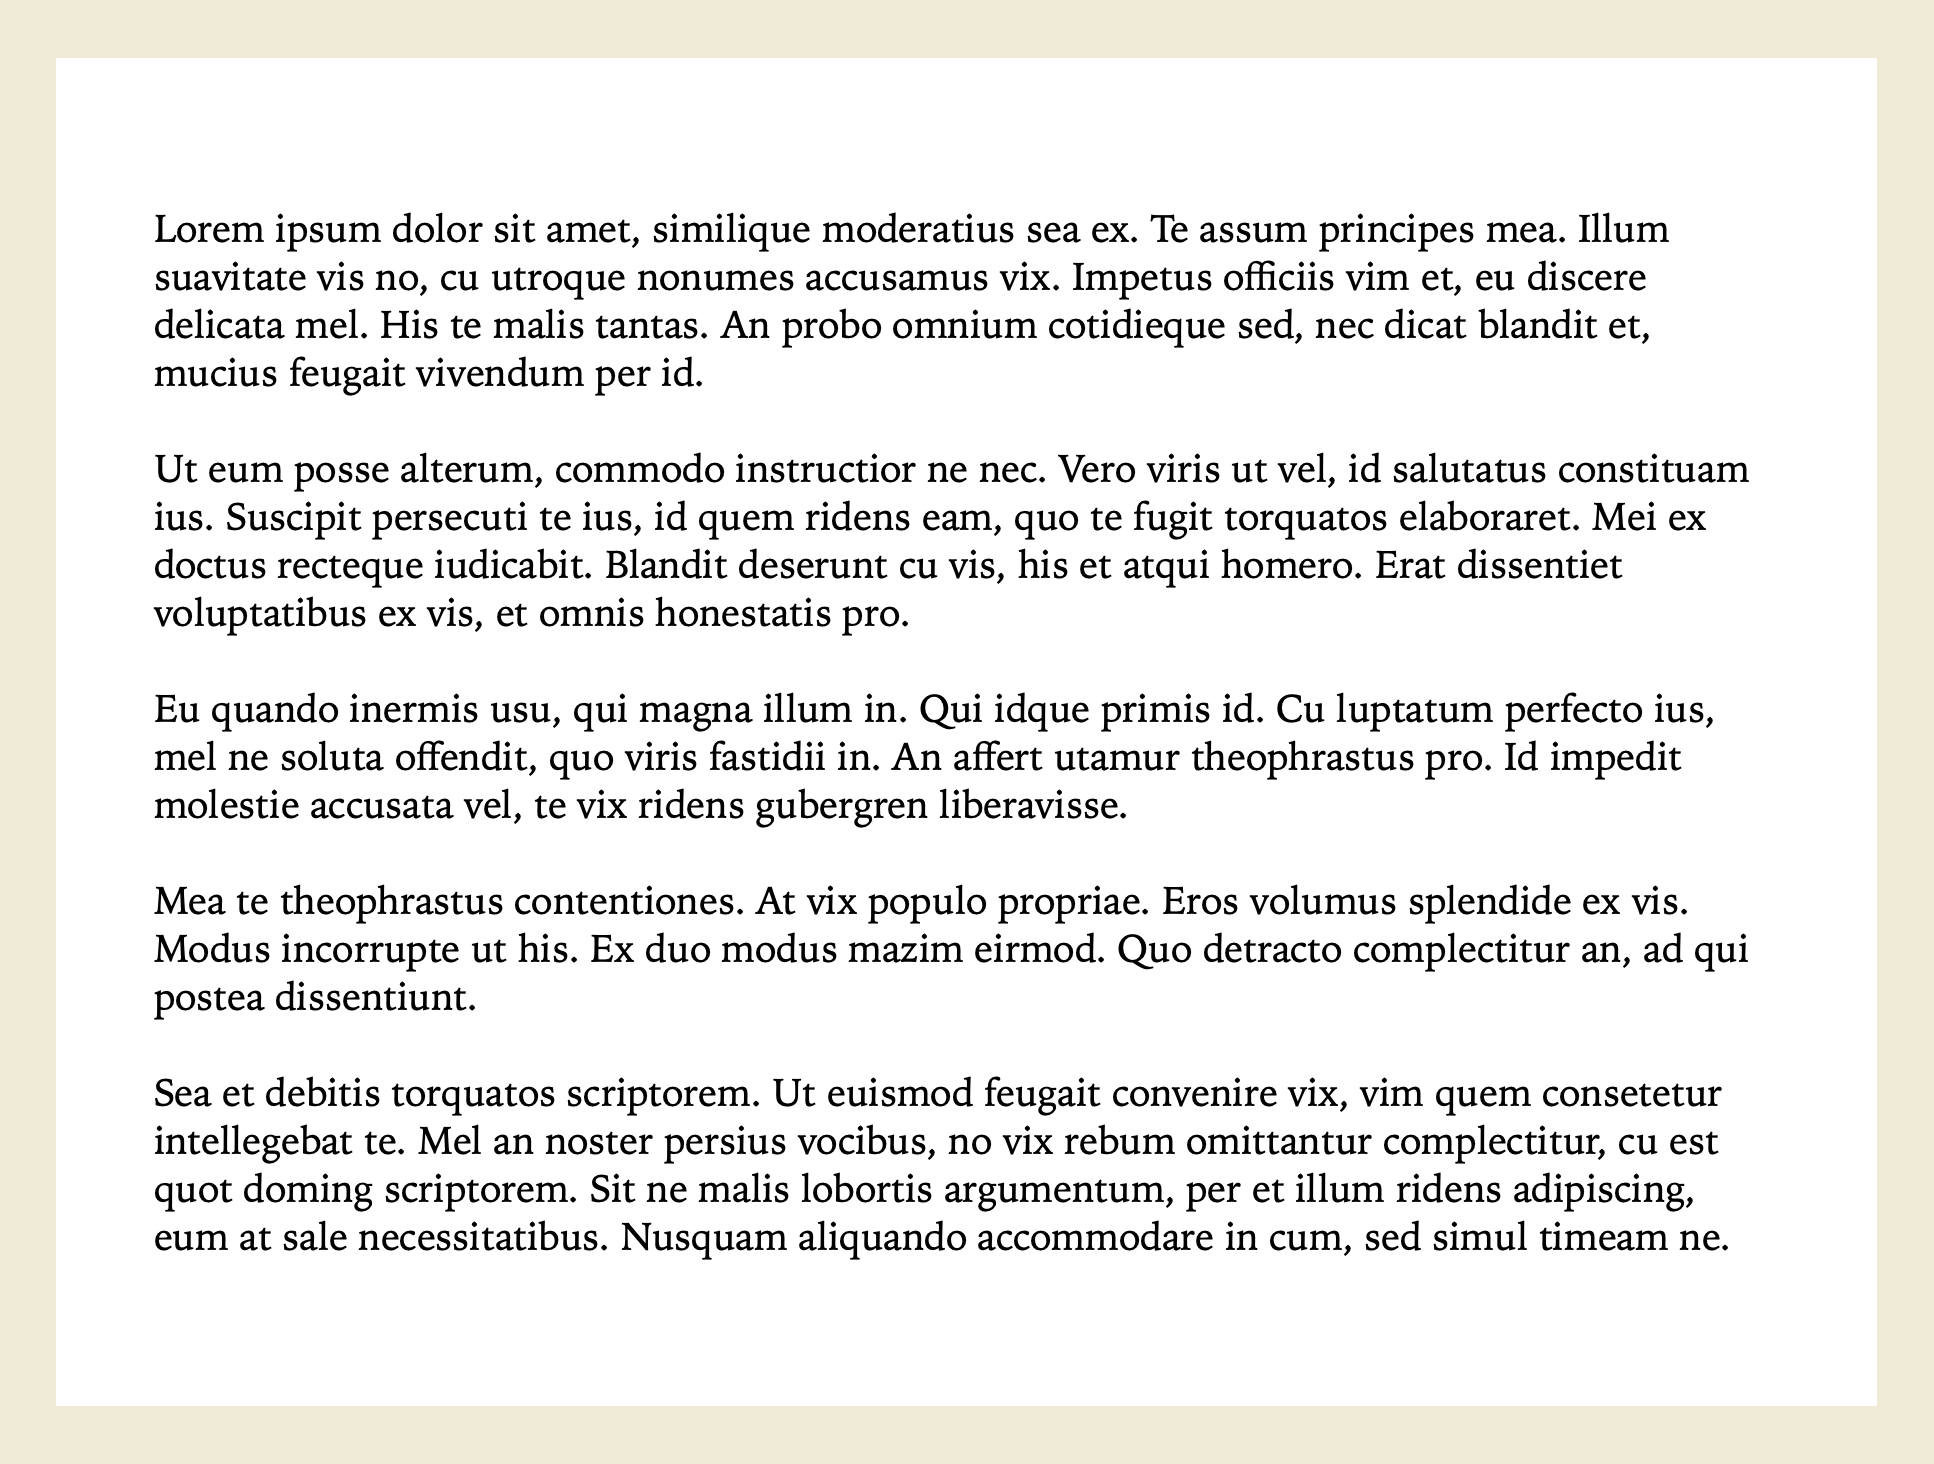
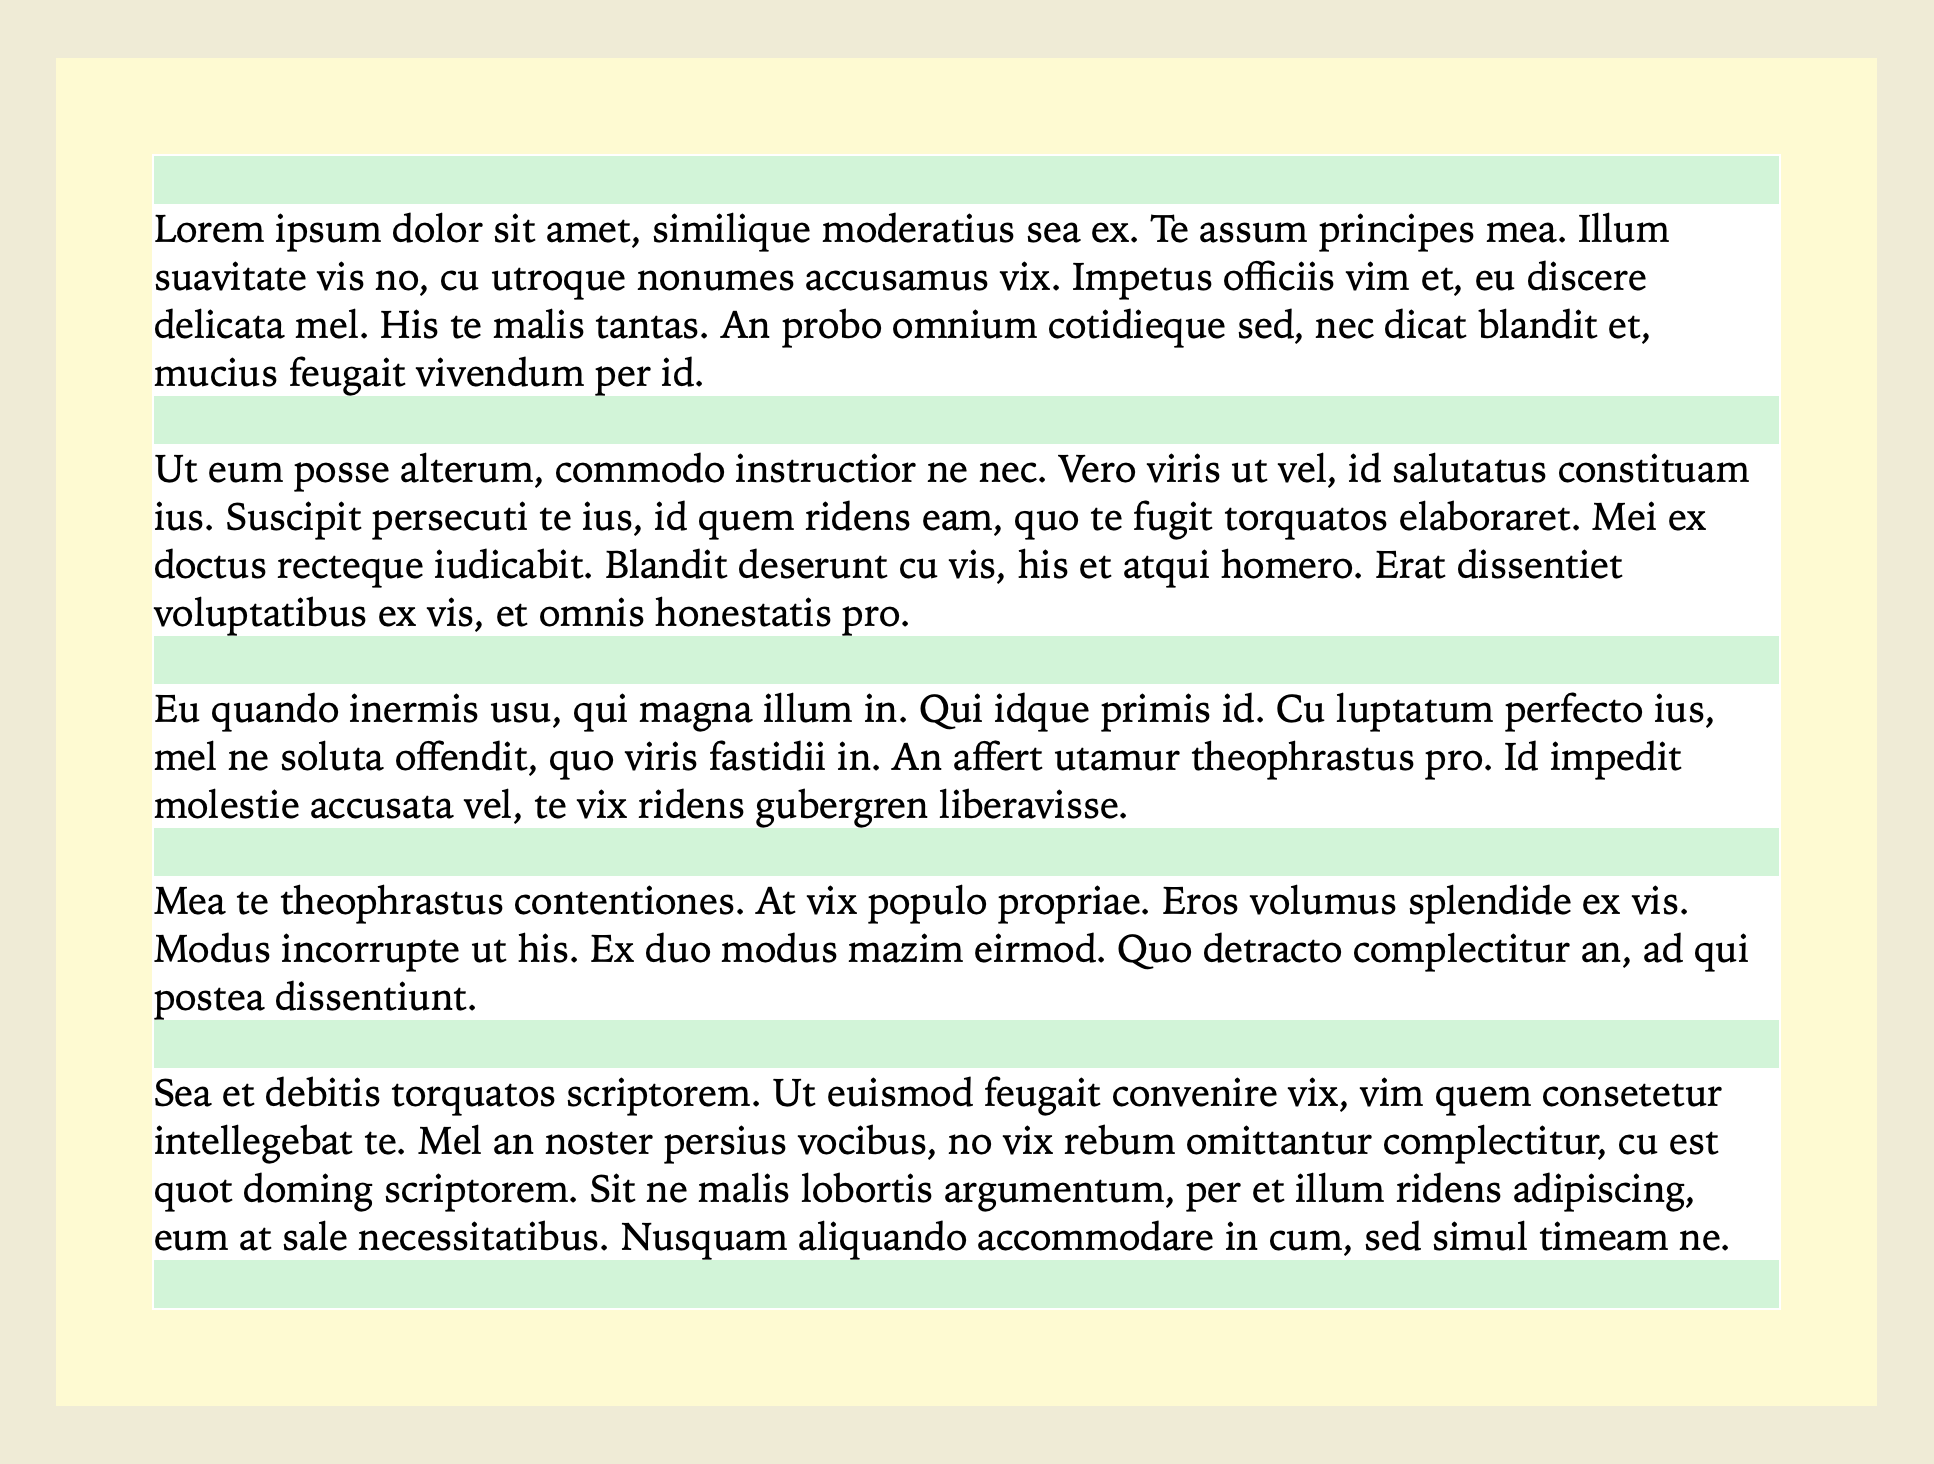
这是非常典型的代码。容器上的内边距本应在盒子的四周创建均匀的空间,但相反,内容上方和下方却出现了额外的空白。就像这样

通过将段落之间的外边距设为 1lh,并将 article 盒子的内边距设为 2lh,我们试图创建一个漂亮的排版布局。让我们打开一些辅助线,以便更好地查看额外空间来自何处。article 盒子的内边距和段落的外边距分别用不同的颜色标记。

第一个和最后一个段落的外边距(1lh)被添加到内边距(2lh)中,以在块方向上创建一个测量为 3lh 的空间。
如果我们消除第一个段落上方的外边距和最后一个段落下方的外边距,设计效果会更好。在有了 margin-trim 之前,我们会尝试移除第一个和最后一个段落的外边距,或者减少块方向上的内边距……但我们采取的任何方法都将取决于内部内容。也许这个 article 的另一个实例会以一个标题开头,该标题的顶部外边距不同。或者以一个没有外边距的图像开头。
如果不完全确定盒子中会有什么类型的内容,很难保证间距能如期望的那样。直到现在。
新的 margin-trim 属性为我们提供了一种直接表达我们想要内容的方式。我们可以告诉盒子消除任何与该盒子相邻的边距。
例如
article {
  margin-trim: block;
  padding: 2lh;
  background: white;
  p {
    margin-block: 1lh;
  }
}
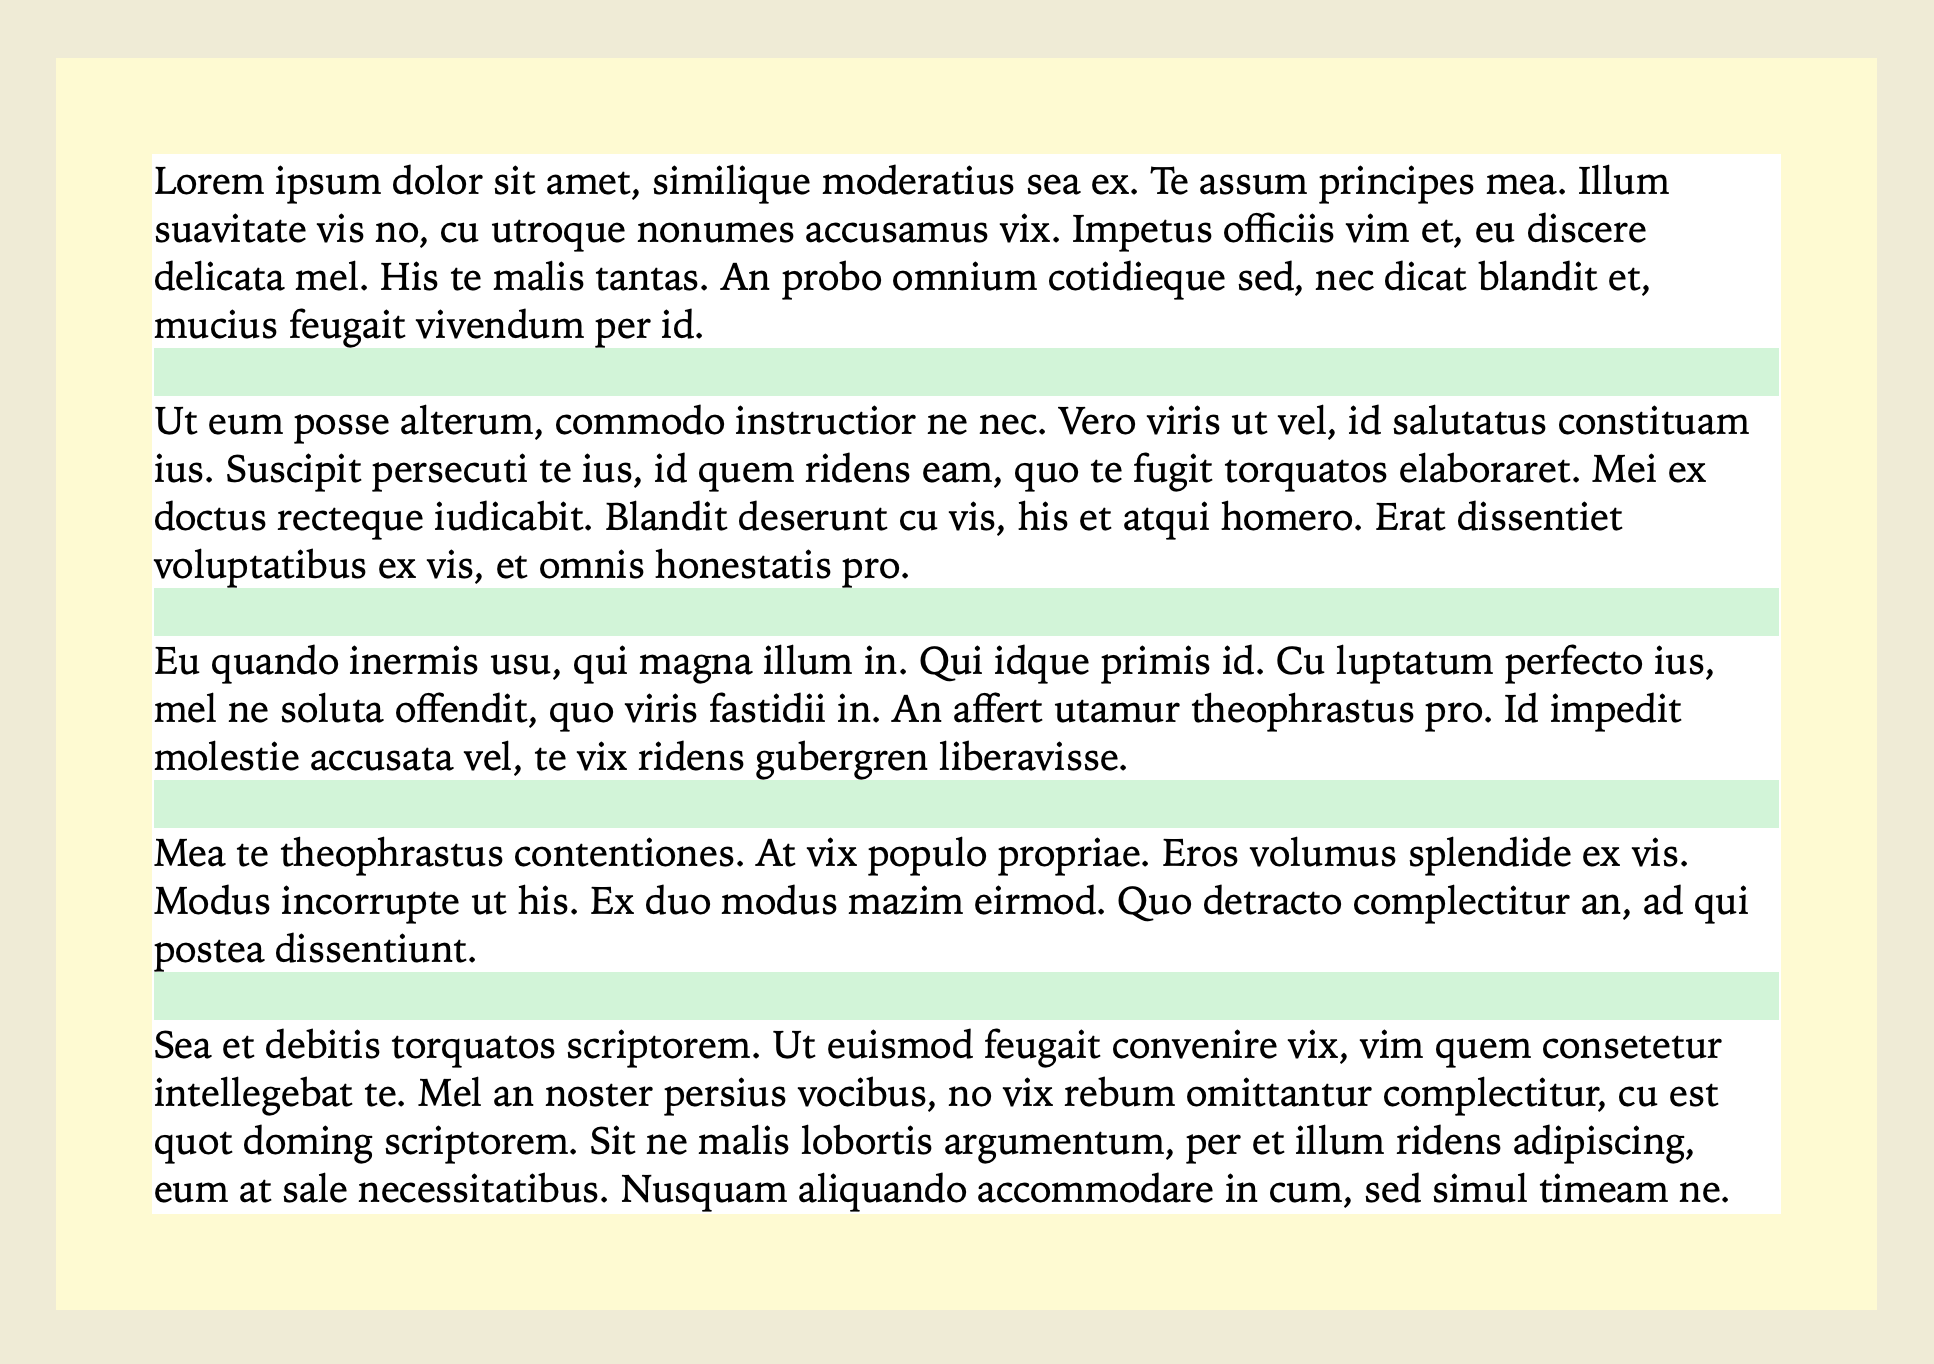
现在,浏览器会自动修剪掉在块方向上(本例中是盒子的顶部和底部)触及 article 盒子边缘的任何边距。

请注意,虽然外边距是在 <p> 元素上定义的,但你是在 <article> 元素上声明 margin-trim。你总是将 margin-trim 应用于容器,而不是最初具有外边距的元素。
这是最终结果。

亲自尝试
你可以在 Safari 16.4 或更高版本中,通过这个实时演示来尝试 margin-trim。

浏览器支持
Safari 在两年多前就已支持margin-trim。但到目前为止,Safari 是唯一支持该属性的浏览器。那么对于不支持的浏览器该怎么办呢?对于我们的演示,你可以在功能查询中编写备用代码,像这样
article {
  margin-trim: block;
  font-size: 1.2rem;
  line-height: 1.3;
  padding: 2lh;
  p {
    margin-block: 1lh;
  }
}
@support not (margin-trim: block) {
  article {
    :first-child {
      margin-block-start: 0;
    }
    :last-child {
      margin-block-end: 0;
    }
  }
}
这有助于阐明 margin-trim 与我们一直在使用的旧技术之间的区别。
使用 :first-child 和 :last-child 时,任何作为容器的第一个或最后一个直接子元素的元素的边距都将被修剪。但任何未被元素包裹或在 DOM 结构中嵌套更深的内容则不会被修剪。

例如,如果第一个元素是一个带有顶部外边距的 figure 元素,并且该 figure 元素包含一个也带有顶部外边距的图像,那么这两个外边距都将由 margin-trim 修剪,而只有 figure 的外边距将由 :first-child 修剪。
<article>
  <figure style="margin-top: 1em">
    <img  style="margin-top: 1em" src="photo.jxl" alt="[alt]">
    <figcaption>[caption]</figcaption>
  </figure>
</article>
margin-trim 属性使得修剪此类外边距比旧技术更简便、更健壮。
尽管目前 Safari 是唯一支持的浏览器,但现在使用它是有意义的。将那些“小技巧”布局代码放在针对不支持浏览器的功能查询中(例如@support not (margin-trim: block) { }),同时为支持 margin-trim 的浏览器使用 margin-trim。希望那些健壮性稍差的代码也能起作用。反正你迟早都得写那些代码。但与此同时,支持的浏览器将获得更健壮的解决方案。随着越来越多的浏览器添加支持,越来越多的用户将能确保拥有一个永不崩溃的布局,无论遇到什么内容。
Margin Trim 选项
margin-trim 的值都是逻辑值,指的是block 和 inline 方向。
margin-trim: nonemargin-trim: blockmargin-trim: inlinemargin-trim: block-startmargin-trim: block-endmargin-trim: inline-startmargin-trim: inline-end
如果你想同时在两个方向上修剪,可以通过组合长格式值来实现。例如
margin-trim: block-start block-end inline-start inline-end;
2024 年 12 月,CSSWG 决定也允许 block 和 inline 这两个较短的关键词组合使用,从而允许如下语法
margin-trim: block inline;
WebKit 已完成工作以支持最后这个选项。很快就能在 Safari 技术预览版中找到它。关注此问题以获取更多更新。
告诉我们
CSS 从未如此出色。我希望你能了解像这样的小改进,并用它来编写更健壮的代码。请在 Bluesky 或 Mastodon 上告诉我你的想法。我很乐意倾听你的故事、功能请求和问题。